Category: Embroidered Patches

  • How Much Do Custom Embroidered Patches Cost? (A Complete Cost Breakdown 2027)

    How Much Do Custom Embroidered Patches Cost? (A Complete Cost Breakdown 2027)

    The price for custom embroidered patches starts around £0.39 and can reach £51.66 for a single patch. The final cost depends on the patch size, the total quantity ordered, and the amount of embroidery coverage.

    For example, if you order 2,000 pieces of a 1-inch patch with 50% coverage, you’ll pay about £0.44 each. On the other end, a short run of ten 7-inch patches with 100% coverage will cost roughly £51.66 per patch.

    Patch Makers UK has no minimum order requirement. They provide free digitising, free delivery across the UK, and will send you a full quote within one business day based on your specific artwork.

    The Science Behind Embroidered Patch Costs

    3-Inch Embroidered Patch Pricing

    Here is the per-patch rate for a 3-inch patch, based on quantity and coverage:

    Coverage 10 pcs 50 pcs 100 pcs 500 pcs 1,000 pcs 2,000 pcs
    50% £12.42 £2.81 £1.87 £0.92 £0.62 £0.59
    75% £13.63 £3.09 £2.04 £1.02 £0.69 £0.66
    100% £14.86 £3.36 £2.23 £1.12 £0.74 £0.72

    Keep in mind that complex artwork might change your quote slightly.

    Calculating Patch Cost and Size

    Size, quantity, and coverage all affect the price. To find your patch size category, add the height and width, then divide by two. A patch that is 2 inches high and 4 inches wide falls into the 3-inch category.

    The Patch Makers UK website has a calculator that shows live pricing ranges based on size, quantity, coverage, and backing type, helping you estimate costs before requesting a quote.

    How to Determine the Custom Embroidered Patch Prices? 

    Several factors determine the cost of a custom patch. Understanding these can help you lower the price without changing your design.

    Patch Size (1 to 7 Inches)

    Size is the main factor in patch pricing. Larger patches require more backing material, thread, and machine time. A 2-inch patch for a cap is on the cheaper end, while a 4-inch patch for a jacket sits in the middle. Back patches over 7 inches require multiple embroidery passes and are quoted individually.

    Quantity and Bulk Orders

    Setting up the embroidery machine has an upfront cost that is split across your entire order. Ordering more patches lowers the cost per piece. The largest price drop happens between 20 and 300 pieces. If you plan to order again later, buying a larger batch upfront will save you money.

    Embroidery Coverage (50%, 75%, 100%)

    Coverage refers to how much thread fills the patch compared to the exposed twill backing. This has a major impact on the price.

    • 50% coverage leaves the twill visible and is the cheapest option.
    • 100% coverage covers the entire fabric with thread and costs the most.
    • 75% coverage is a popular middle ground.

    Lowering coverage from 100% to 75% or 50% is a direct way to cut costs.

    Thread Colours

    Every extra thread colour requires the machine to stop and load a new spool, which adds to the cost. Most standard orders include 6 to 12 colours. Reducing the number of colours in your design will lower the price.

    3D Puff Embroidery

    3D embroidery costs more than flat embroidery. It uses a foam layer under the stitches to create a raised effect, requiring extra stitches and more production time. Metallic and glow-in-the-dark threads also cost more.

    Backing Type

    • Sew-on backing is usually the cheapest and is included in the base price.
    • Iron-on backing adds a small fee for the adhesive layer.
    • Peel-and-stick backing costs slightly more than iron-on patches.
    • Velcro backing is the most expensive standard option because it requires an extra layer of material.

    Border Style

    • Merrowed borders (classic overlocked stitching) are the standard and cheapest option.
    • Hot-cut borders (heat-sealed edges) suit intricate shapes and cost a bit more.
    • Laser-cut borders provide the most precise edge for irregular shapes and are the most expensive.

    Custom Embroidered Patch Prices by Size 

    Pricing by Size (100 pieces)

    Here are the benchmark rates for an order of 100 pieces across different sizes:

    Size 50% to 100% Coverage Range
    2 inches £1.39 to £1.66
    3 inches £1.87 to £2.23
    4 inches £2.40 to £2.88
    5 inches £3.19 to £3.87
    7 inches £6.12 to £7.45

    Prices increase with size because material and thread usage scale with surface area. Sizes are available in half-inch increments up to 7 inches. Anything larger requires a custom quote.

    Additional Custom Patch Costs and Fees 

    VAT and Hidden Fees

    Always check if a quote includes VAT before comparing prices. Ask for the full total to avoid surprises at checkout.

    Confirm if the following fees are included:

    • Digitising fee: The cost of turning artwork into an embroidery file. Patch Makers UK waives this on standard orders, but other suppliers may charge £20 to £60.
    • Rush production: Standard delivery is 7 to 10 business days. Expedited delivery (3 to 5 days) usually adds 15% to 30%.
    • Delivery: Patch Makers UK offers free delivery in the UK. Overseas suppliers might have hidden import duties or longer delivery times.
    • Oversized patches (7+ inches): These require custom quotes.
    • Revision fees: One or two mockups are usually free, but major design changes might cost extra.

    Choosing Between UK and Overseas Patch Makers? 

    Ordering from the best UK custom patch supplier helps you avoid import duties and customs delays. A cheaper quote from an overseas supplier might end up costing more once customs charges are added.

    Real Custom Embroidered Patch Pricing Examples 

    • Small Club Run: 100 patches, 3 inches, 75% coverage, sew-on backing. £2.04 per patch.
    • Corporate Rollout: 500 patches, 3 inches, 100% coverage, standard turnaround. £1.12 per patch.
    • Bulk Distribution Run: 2,000 patches, 3 inches, 50% coverage, sew-on backing. £0.59 per patch.

    Other Types of Custom Embroidered Patches 

    Embroidered patches are durable and have a traditional texture. If you want a different look, woven patches offer a flat, smooth finish with more detail. PVC rubber patches are bold and colourful with a 3D edge. Sequin patches provide an all-over sparkle.

    How to Estimate the Best Price for Custom Embroidered Patches? 

    1. Order in bulk. Rounding up your order (e.g., 90 to 100 pieces) can lower the per-patch rate.
    2. Simplify the design. Fewer colours mean less machine time and lower costs.
    3. Lower the coverage. Dropping to 75% or 50% coverage cuts costs without reducing the patch size.
    4. Skip 3D puff. Flat embroidery is cheaper.
    5. Choose standard shapes. Circles, ovals, and rectangles avoid extra die or laser-cut charges.
    6. Compare quotes. Check the full total, including VAT and digitising fees, not just the per-patch rate.

    Frequently Asked Questions

    How much do 100 custom embroidered patches cost?

    The price of custom embroidered patches, either 1 or 100 pieces, depends on the patch size and embroidery coverage. Large patches with detailed embroidery will naturally cost more, but ordering in bulk will help you reduce the cost per patch.

    Does embroidery coverage affect the price?

    Embroidery coverage does increase the price because a patch with more embroidery coverage will require more machine time. You can drop the coverage to 75% or 50%, which can make a major difference in cost without changing the patch size.

    Does ordering more patches reduce the price?

    Yes. Larger orders cost less per patch because more pieces can divide the setup and production cost. If you are aware that you will need more patches later, it is better that you order a bulk batch upfront and save per patch cost.

    Is there a minimum order for custom embroidered patches?

    Patch Makers UK has no minimum order requirement, so you can order a small quantity if you need a few patches only.

    Does the size of an embroidered patch affect its price?

    Yes, size affects the price of an embroidered patch because large patches use more backing material and thread and take longer to produce.

    Are there extra costs for custom embroidered patches?

    There can be an extra cost, depending on the supplier and your requirements, such as rush orders. Patch Makers UK provides free digitising and UK delivery on standard orders, but it’s still worth checking the full quote before comparing suppliers.

    Do I pay import duty when ordering embroidered patches?

    It depends on where you are ordering from. Buying from a UK-based supplier generally cuts the import duties and customs issues that can come with overseas orders.

    How long does it take to make custom embroidered patches?

    Production time depends on the order size, design complexity, and your delivery requirements. The standard turnaround is around 7 to 10 business days, while rush production can take around 3 to 5 days and may cost an additional 15% to 30%.

    Does the number of thread colours affect the price?

    It can affect the price because each additional thread colour may call for extra machine stops and setup, due to which production time and cost can increase. Simpler designs will help you lower the price.

    Is 3D puff embroidery more expensive than standard embroidery?

    Yes, 3D puff embroidery does cost more than normal flat embroidery because it uses a layer of foam underneath the stitches to create a 3D effect. This requires additional materials, stitching, and production time.

    Get the Best Value for Your Custom Embroidered Patches 

    Getting the best price for custom embroidered patches is not always about choosing the cheapest quote. Size, quantity, embroidery coverage, backing, thread colours, and extra fees can all change the final cost. You may want to keep your budget under control, so to save up some money you can order in bulk, choose the right coverage, simplifying your design also helps, and always compare the full quote.

    With Patch Makers UK, you can order any quantity with free digitising and delivery in UK. If you are ready to know your patch price, then you can get your free quote right today and start your order.

  • Step-by-Step Guide: How to Digitize a Logo for Embroidery for Custom Patches in the UK

    Step-by-Step Guide: How to Digitize a Logo for Embroidery for Custom Patches in the UK

    Have you ever wondered how embroidered patches with complex logos maintain such sharp details? Whether it’s a personalised football team patch in the UK, a custom embroidered patch for workwear, or a military embroidered patch, the secret lies in one precise process — digitisation

    Digitizing a logo for embroidery is far more complex than simply scanning an image. It involves converting a digital design into a machine-readable stitch file that instructs the embroidery machine on exactly where, how, and in what direction to stitch each element. If you’re looking to order embroidered patches online in the UK, understanding this process can help ensure you get the best results.

    In this step-by-step guide, we’ll break down how to make custom embroidered patches in the UK, so whether you’re a business owner, a fashion enthusiast, or a brand looking for high-quality embroidered patches, you’ll know exactly what to expect.

    Why is Logo Digitisation Important?

    Before diving into the steps, it’s essential to understand why digitisation is the backbone of custom embroidered patches.

    1. Precision & Clarity – A properly digitized logo ensures crisp lines and perfect stitching. This is crucial for custom embroidered patches for jackets in the UK and other detailed designs.
    2. Consistency – Whether you need embroidered patches for school uniforms in the UK or custom biker embroidered patches, digitisation ensures that every patch looks exactly the same.
    3. Fabric Adaptability – The right digitisation process allows your logo to be embroidered on various materials, from jackets to workwear.
    4. Faster Production – A well-digitized file reduces machine errors and rework, speeding up production and ensuring quicker delivery of your custom embroidered patches in the UK.

    Now that you know why digitisation matters, let’s break it down into steps.

    Step-by-Step Guide: How to Digitize a Logo for Embroidery

    1. Choose the Right Logo File

    The first step is to get a high-resolution logo file. The quality of the image you provide plays a huge role in the final result — whether you’re ordering custom patches for workwear, uniforms, or clothing in the UK.

    Related: Ways For Creating Unique Custom Embroidered Name Patches

    Best File Formats:

    • Vector files: AI, EPS, SVG (preferred)
    • High-resolution images: PNG, JPG (300 DPI or higher)

    If your logo isn’t in the right format, you may need to recreate it as a vector or work with a professional embroidered patch supplier in the UK to adjust it.

    2. Import the Logo into Digitizing Software

    Once you have your logo ready, the next step is to load it into embroidery digitizing software. Popular digitizing software includes:

    • Wilcom
    • Hatch Embroidery
    • Brother PE-Design
    • Janome Digitizer

    These programs help convert your logo into a stitch file, which tells the embroidery machine where and how to stitch each detail.

    3. Adjust the Stitch Type

    Choosing the right stitch type depends on three factors: design complexity, fabric type, and the intended purpose of the patch. Common stitch types include:

    Satin Stitch

    • Best for text and thin outlines
    • Commonly used in custom logo embroidered patches in the UK

    Fill Stitch

    • Used for large solid areas
    • Provides durability for custom iron-on patches in the UK

    Straight Stitch

    • Ideal for fine details and shading
    • Works well for military custom embroidered patches in the UK

    If you’re ordering from the best embroidered patch manufacturer in the UK, they will likely suggest the best stitch for your specific design.

    4. Define the Stitch Direction

    Stitch direction plays a significant role in how the final patch looks. Proper stitch direction ensures:

    • Smooth texture
    • Minimal thread breakage
    • Efficient machine operation

    For instance, if you’re designing custom embroidered patches for jackets in the UK, the stitch direction needs to be set strategically to enhance the fabric’s movement.

    5. Select the Thread Colours

    The right thread colours will bring your logo to life. Most professional embroidered patch suppliers in the UK use Pantone color matching to ensure your design stays true to your brand’s identity.

    [pro_tip title=”Pro Tip:”] If you’re ordering custom embroidered patches for workwear in the UK, use bold and high-contrast colours to make the logo pop. [/pro_tip]

    6. Set the Underlay Stitches

    Underlay stitches are the foundation of your embroidery. They help stabilize the fabric and prevent distortion. For custom biker embroidered patches in the UK, underlay stitches ensure the design stays intact even under rough conditions.

    Common underlay types:

    • Edge Walk Underlay – Ideal for custom logo embroidered patches in the UK
    • Zig-Zag Underlay – Adds extra durability to military custom embroidered patches


    7. Convert & Save the Stitch File

    Now that all the settings are in place, it’s time to convert the design into a machine-readable format. Some common embroidery file formats include:

    • DST – Used by most commercial embroidery machines
    • PES – Compatible with Brother and Babylock machines
    • EXP – Used for Bernina embroidery machines

    Once saved, the file is ready to be transferred to an embroidery machine.

    8. Test the Design Before Production

    Before mass production of your custom embroidered patches in the UK, always run a sample test. This step helps identify:

    • Thread breaks
    • Misalignment issues
    • Incorrect color matching

    Many of the best embroidered patch manufacturers in the UK perform this test to ensure high-quality embroidered patches every time.

    Related: How Woven Patches Are Revolutionizing Fashion Trends in the UK

    9. Load the File into the Embroidery Machine

    Now that your digitized logo is ready, it’s time to load the file into the embroidery machine. Most machines allow you to transfer files using:

    • USB Drive – The most common method for commercial embroidery machines.
    • Wi-Fi or Direct Software Connection – Some high-end machines support direct transfer from digitizing software.

    Once the file is successfully loaded, the embroidery machine will read the stitch data and prepare for the next step.

    10. Prepare the Fabric & Embroidery Hoops

    Before starting the embroidery process, you need to prepare the fabric where the logo will be stitched. Proper fabric preparation ensures high-quality results for custom embroidered patches for jackets in the UK and other apparel.

    Choose the Right Fabric: Consider the texture and stretchability. For workwear, opt for durable materials.
    Stabiliser Selection: Use a stabiliser to prevent the fabric from shifting. A strong stabiliser is essential for custom biker embroidered patches in the UK and military custom embroidered patches.
    Secure the Fabric in the Hoop: Ensure the material is tightly secured in the embroidery hoop to maintain precision.

    This step is crucial, especially when producing personalised embroidered patches for clothing in the UK, as loose fabric can lead to misalignment.

    11. Run the Embroidery Machine

    Now that everything is set, it’s time to start the embroidery process. The machine will stitch the design based on the digitized file, layering each thread according to the stitch pattern.

    Depending on the complexity of the design, this process can take anywhere from a few minutes to an hour. High-density designs, like those used for best embroidered patches for jackets in the UK, may take longer to stitch.

    Tip: If you’re producing custom iron-on patches in the UK, ensure that the machine applies a heat-activated adhesive backing during this stage.

    12. Trim the Excess Threads & Backing

    Once the embroidery is complete, the patch is removed from the machine. The next step involves trimming any excess threads and stabiliser backing.

    Clean Edges: Ensure that loose threads are removed for a polished finish.
    Apply Heat-Seal Backing (if required): For custom iron-on patches in the UK, a heat-seal backing is added at this stage.
    Quality Check: Each patch should be inspected for consistency, ensuring the best output for high-quality embroidered patches in the UK.

    This step is critical for patches that will be sewn onto garments, like embroidered patches for school uniforms in the UK or custom embroidered patches for workwear in the UK.

    Why Choose Patch Makers UK for Custom Embroidered Patches?

    Now that you understand how to digitize a logo for embroidery, you may be wondering where to get your patches made. If you’re looking for the best embroidered patch supplier in the UK, look no further than Patch Makers UK!

    Ready to bring your brand to life? At Patch Makers UK, we handle every step — from expert digitisation to final production — delivering high-quality custom embroidered patches across the UK. Get in touch today for a free quote and fast turnaround.

  • Why Small Text Fails on Embroidery and Better Patch Options

    Why Small Text Fails on Embroidery and Better Patch Options

    There’s nothing more heartbreaking than approving a patch design that looks razor-sharp on screen… only to receive the finished embroidery and realise your small text has turned into a fuzzy suggestion of letters. Not a typo. Not a machine fault. Just the brutal reality of embroidery physics.

    If you’ve ever squinted at a badge thinking, “That was meant to say something, right?” , you’re not alone.

    Small text is the silent killer of embroidered patches. But here’s the good news: woven or sublimated patches exist specifically to fix this problem, and when used properly, they’re absolute game-changers for branding, uniforms, events, and fashion.

    Let’s break down why embroidery struggles with fine detail, when it still works, and exactly how woven or sublimated patches save the day, without wrecking your budget or your brand image.

    The Hard Truth About Embroidery and Small Text

    Embroidery is brilliant. Timeless. Premium. Rugged. But it’s not magic.

    Embroidery works by stitching thick threads into fabric using needles that physically move up and down. That mechanical reality creates limitations, especially when text gets small.

    Why Embroidery Struggles with Tiny Lettering

    Here’s what actually goes wrong:

    • Thread thickness: Embroidery threads are thicker than pixels or ink
    • Needle penetration: The needle needs physical space to punch through fabric
    • Pull and tension: Tight stitching causes letters to close up
    • Fabric distortion: Small shapes lose definition as fabric shifts

    Once text drops below around 5–6mm in height, embroidery starts to blur letters together. Serifs disappear. Spaces close. Counters fill in. Suddenly “EST. 1998” looks like modern art.

    This isn’t about poor digitising or a bad patch maker, it’s simply the wrong technique for the job.

    When Embroidery Still Works (And When It Doesn’t)

    Embroidery still has its place.

    Embroidery Works Best For

    • Bold lettering
    • Block fonts
    • Large logos
    • Simple shapes
    • Classic crests and badges
    • Custom military patches UK style
    • Custom biker patches for jackets

    Embroidery struggles with

    • Fine text
    • Thin fonts
    • Small taglines
    • Legal lines
    • Website URLs
    • Dense information
    • Small custom logo patches for hats

    If your design relies on clarity at a glance, especially at small sizes, embroidery may not be your best mate.

    That’s where woven or sublimated patches step in.

    Why Woven Patches Fix Small Text Problems

    Woven patches use thin threads woven together on a loom, rather than stitched into fabric. Think of it like high-resolution fabric printing using thread.

    What Makes Woven Patches Different

    • Much finer threads
    • No needle penetration into a base fabric
    • Tighter weave density
    • Sharper edges
    • Clear letter separation

    The result? Text that actually looks like text.

    This is why woven patches are widely used for:

    • Name patches
    • Rank badges
    • Event patches
    • Club member patches
    • Corporate logo patches UK made
    • Custom employee name patches for workwear

    If your design includes small letters, woven patches are often the best custom patches to order without redesigning everything.

    For a deeper comparison between styles, this guide breaks it down nicely: Pick the Best: Embroidered vs Sublimation vs Woven Patch. 

    When Sublimated Patches Are the Ultimate Fix

    If woven patches are sharp, sublimated patches are surgical.

    Sublimation uses heat to permanently bond dye into the patch surface. No threads. No stitches. No distortion.

    Why Sublimated Patches Handle Tiny Text Perfectly

    • Text is printed, not stitched
    • Zero thread thickness
    • Unlimited colour detail
    • Crisp edges at any size
    • Photographic clarity

    This makes sublimated patches ideal for:

    • Micro text
    • Fine outlines
    • QR codes
    • Colour gradients
    • Multi-language designs
    • Promotional patches for brand marketing
    • Custom patches for events and festivals

    If your patch includes information that must be readable, sublimation is often the safest choice.

    Woven vs Sublimated Patches for Small Text

    Let’s make this practical.

    Choose Woven Patches When:

    Choose Sublimated Patches When:

    • Text is very small
    • Colour accuracy matters
    • You want photo-level detail
    • The design is complex
    • You need fast turnaround custom patches UK

    Both options massively outperform embroidery for fine detail.

    Common Design Mistakes That Kill Small Text

    Even with woven or sublimated patches, bad design choices can still trip you up.

    Avoid these classic errors:

    • Ultra-thin fonts
    • Script fonts at small sizes
    • Low contrast colour combos
    • Cramming too much text into one patch
    • Ignoring viewing distance
    • Designing for screen, not fabric

    A solid custom patch maker will flag these issues before production, which is why working with the best patch maker in the UK actually saves money long-term.

    How to Fix Small Text Without Redesigning Everything

    Good news, you don’t always need a full redesign.

    Here are smart fixes that work:

    • Switch embroidery to woven patches
    • Convert micro text to sublimation
    • Increase text size slightly
    • Boost contrast
    • Separate text into a secondary patch
    • Use backing options that stabilise detail

    If you’re unsure how a patch will sit on clothing, this article is a solid reference: Get Custom Design Patches to Match Any Outfit or Style. 

    Best Backing Options for Fine Detail Patches

    The backing matters more than most people realise.

    For small text clarity:

    • Heat seal backing keeps edges flat
    • Sew-on backing offers flexibility
    • Velcro backing works well for uniforms and tactical use

    Avoid cheap adhesives that can warp the patch over time, especially for sublimated patches.

    Cost Comparison for Small Text Patches

    Let’s talk numbers, because everyone asks.

    Typical Pricing Factors

    • Patch type
    • Size
    • Quantity
    • Backing choice
    • Turnaround speed

    Generally speaking:

    • Woven patches cost slightly more than embroidery
    • Sublimated patches are often cheaper for complex designs
    • Bulk orders reduce cost per unit dramatically
    • Cheap custom patches with no minimum are possible with the right setup

    If you’re asking how much do custom patches cost, the answer depends on choosing the right technique first, not fixing mistakes later.

    FAQs

    Why does small text look bad on embroidered patches?

    Embroidery uses thick thread and needle penetration, which causes small letters to merge and lose definition.

    What is the minimum readable text size for embroidery?

    Around 5–6mm tall. Anything smaller risks clarity issues.

    Are woven patches better than embroidered patches?

    For small text and fine detail, yes. Woven patches offer higher resolution and sharper lettering.

    Do sublimated patches last as long as embroidered ones?

    Yes, when produced correctly. Sublimated patches are colourfast and durable for regular wear.

    Which patch type is best for logos with small writing?

    Woven or sublimated patches are usually the best choice.

    Can I mix patch types in one order?

    Absolutely. Many brands use embroidery for bold logos and woven or sublimated patches for detail work.

    Why This Choice Matters!

    Your patch is often the first thing people notice. It represents your brand, your club, your event, or your identity. Letting small text fail because of the wrong production method is an avoidable mistake and an expensive one.

    If clarity matters, embroidery isn’t always the hero. Woven or sublimated patches exist for a reason, and using them properly separates professional branding from amateur disappointment.

    If you’re planning to buy custom patches online, ordering bulk patches, or launching a branded range, get the technique right from day one. The difference isn’t subtle, it’s night and day. Small text doesn’t have to fail. You just need the right patch from Patch Makers UK to back it up.

  • Bold and Beautiful Colour Psychology in Custom Embroidery

    Bold and Beautiful Colour Psychology in Custom Embroidery

    Red isn’t just red. It’s fire, power, rage, and a little rebellion when stitched onto the right denim jacket. And yellow? That’s not just sunshine, it’s confidence dripping in thread. In the world of custom embroidery, colour isn’t just an aesthetic choice; it’s a language and let’s be honest, sometimes it shouts.

    Welcome to the world of custom patches, where colour psychology is the underrated secret sauce behind unforgettable designs. You can have the slickest stitch, the fanciest font, or the tightest border but without the right colour? Meh. It’s giving basic.

    Whether you’re repping a corporate team, designing band merch, or gearing up your biker squad, how you play with colour will decide if people stop and stare or scroll on by.

    Colour Psychology: Not Just For Marketers Anymore

    Let’s break it down, real simple. Every colour carries emotional weight, and in custom embroidered patches, that emotion becomes wearable. This is your silent ambassador doing the talking long before your brand or badge is even noticed.

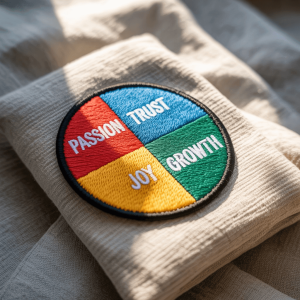
    • Red = Passion, aggression, attention. Great for emergency teams, action sports, and, let’s be real, folks who like to be noticed from across the parking lot.

    • Blue = Trust, loyalty, professionalism. You’ll find it all over corporate logos and custom patches made in UK for uniforms, especially when you’re playing the long game in credibility.

    • Green = Growth, eco-friendly vibes, money. Popular in startups, lifestyle brands, and those “sustainable streetwear” types.

    • Black & White = The eternal combo. Minimalist. Classic. Works for custom logo patches for hats or jackets when you want high contrast and high impact.

    If you’re scrolling through a thread colour chart like it’s a candy store menu, pause. Ask yourself: what story is this colour trying to tell?

    Why Colour Choice Matters in Corporate and Creative Patches

    A patch for a corporate event won’t hit the same as one for a punk music festival. Choosing neon orange for a law firm? Bold, but maybe save it for Halloween merch. Going for soft pastels on a sports badge? That might raise more brows than fists.

    Smart brands are combining colour theory with design to emotionally connect with their audience. No longer are patches just identification tools, they’re personality amplifiers. Just check out the UK#1 guide to custom patch sizes, types, colours, borders & backings and you’ll see how layered patch psychology has become.

    If you’re a patch maker worth your bobbins, you’ll help clients dodge colour chaos and steer toward tones that enhance not dilute their message.

    Twill Fabric vs Thread: Who’s Really in Control?

    Here’s the twist most newbies miss: it’s not just about thread colour, it’s also about your twill fabric colour. This backdrop can either elevate or overshadow your stitching.

    Take white thread on a neon-green twill: subtle? Absolutely not. But for streetwear or rave merch, it might just be genius. Now flip that to navy thread on black twill for a law enforcement patch, it says serious business without screaming about it.

    The key? Contrast, baby. And restraint. Because let’s be honest, just because you can go full rainbow doesn’t mean you should.

    Tone Matching: Getting Your Patch Vibe Right

    Let’s say you’re creating a custom sequin patch for a fashion launch, something dazzling and bold. Would you pair that with muted earth tones? Heck no. That patch needs sass, shine, and saturation.

    On the flip side, for personalised clothing patches in the handmade, indie, or minimalist space, muted palettes like taupe, dusty rose, or sage green rule the playground.

    This is where UK-based brands looking to buy custom patches online need a patch maker who understands more than just production, they need someone fluent in fabric language.

    Getting It Right From Design to Delivery

    So, how do you start your colour journey without ending up with a Frankenpatch?

    Step one: Work with the best patch maker in the UK, one that understands the balance between embroidery art and fabric science. They’ll help you sketch out your design, choose thread and twill wisely, and avoid rookie combos that scream “DIY gone wrong.”

    Whether you’re working on bulk corporate logo patches or ordering a one-off passion project, nailing colour psychology is the difference between “meh” and “whoa, where’d you get that?”

    For more on crafting with intent, explore our blog on Your Trusted Go-to Source for Quality Custom Patches in the UK.

    A custom embroidery patch illustrating the principles of color psychology.

    Colour Pairing Rules That (Shouldn’t Be) Broken

    Pairing colours in embroidery isn’t just about what looks cute on a mood board. You’re stitching personality into fabric, and every pairing sends a message.

    High contrast = loud and proud.

    Think black and white, red and yellow, royal blue on white twill. These combos are bold and readable from afar, making them ideal for custom team patches for sports uniforms, emergency services, or loud fashion brands with zero chill.

    Tone-on-tone = classy whisper.

    Dusty pink on blush twill? Deep navy on midnight black? These say elegance, subtlety, and a quiet flex. Perfect for corporate logo patches UK made or upscale brand merch.

    Analogous shades = harmony over hype.

    These are the side-by-side neighbours on the colour wheel (like blue + teal + green). Use these when you want your custom clothing patches to vibe together instead of scream for attention.

    Not sure where to start? That’s where an experienced embroidery patch maker becomes your BFF not only helping you choose a killer thread palette, but also steering you away from “I saw it on Pinterest” disasters.

    Colour + Texture = Custom Patch Chemistry

    Colour psychology is a big deal but throw in patch textures like chenille, leather, PVC, or sequin, and now you’re in elite territory.

    • Chenille + bold colours = varsity vibes. Perfect for sporty branding or custom patches for small businesses targeting younger demographics.

    • Leather + earthy hues = rugged sophistication. Hello, biker patches or high-end accessory lines.

    • Sequins + saturated brights = disco-era statement. Great for event patches, dance crew uniforms, or fashion collabs.

    Basically, don’t just think in colours. Think in layers. Think in feels. Think like the fashion-forward version of a branding psychologist.

    Custom Patches That Actually Convert

    Let’s talk ROI because you’re not making custom patches just to feel artsy. You want people to remember you. Colour can lock you into memory quicker than any tagline or logo font.

    That’s why savvy marketers use promotional patches for brand marketing not only to display their logo, but also to build associations:

    • Warm tones = energy + action (for fitness or wellness brands)

    • Cool tones = trust + calm (for tech, finance, or education)

    • Neutrals = balance + versatility (for fashion and lifestyle)

    Want your corporate patches to stay stuck in your audience’s brain? Stitch a story in colour they won’t forget.

    For inspo on choosing the right format for your colour-laden masterpiece, check out the UK#1 Guide to Custom Patch Sizes, Types, Colours, Borders & Backings.

    Our Pro Tips for Colour-Crushing Custom Patches

    Here’s the no-fluff checklist we swear by when crafting bold and beautiful custom embroidery:

    Start with a clear emotional goal. What vibe are you aiming for edgy, elegant, playful, powerful?

    Balance bright and neutral. Too much of one and you’re either blinding or boring your viewers.

    Think about where. A patch worn outdoors? Use darker tones to handle grime. Office use? Lighter colours can work fine.

    Use colour to create hierarchy. Make your logo or key graphic pop with contrast; let other elements fade into the background.

    Test your palette with mockups. Seeing is believing, and a digital test can save you hundreds in regrets.

    And when in doubt? Trust your custom patch factory (that’s us) to guide your palette in the right direction without ever cramping your style.

    The Wrap-Up: Don’t Just Wear It. Feel It.

    Colour isn’t just design, it’s storytelling in thread. If you want your patch to say more than just “we exist,” you need to be bold, strategic, and yeah, a little gutsy with your palette.

    Custom embroidery is art. But when you add the psychology of colour? Now it’s communication. So whether you’re creating custom embroidered patches for hoodies, building bulk custom patches for uniforms, or exploring personalised embroidery patches for your brand’s next drop make every hue count.

    For expert help turning your colour concept into wearable reality, contact the UK#1 Custom Patch Manufacturer, a team that knows how to stitch it, shade it, and ship it right to your doorstep with flair.

  • What Embroidery Patches Coverage to Choose: 50%, 75%, or 100%?

    What Embroidery Patches Coverage to Choose: 50%, 75%, or 100%?

    Ordering custom embroidered patches sounds simple, until you hit the coverage options. Suddenly, you’re faced with numbers: 50%, 75%, 100%. What do they actually mean? And which one makes sense for your patch design?

    Let’s make it easy.

    Whether you’re ordering for a company event, biker crew, or clothing brand, this guide breaks down what embroidery coverage is, how it affects your patch, and when each option makes sense.

    What Does “Embroidery Coverage” Mean?

    Embroidery coverage is how much of your custom embroidered patch’s fabric gets stitched over with thread.

    Think of your patch as a canvas. Coverage is how much of that canvas is “painted” with thread.

    • 50% Coverage: Half of the patch shows stitching; the other half shows base fabric.

    • 75% Coverage: Most of the patch is stitched, but some background still shows.

    • 100% Coverage: Every inch of the patch is thread, no background peeking through.

    The higher the coverage, the more threadwork involved. That affects the look, the texture, and yes, the price.

    Why Coverage Even Matters

    Coverage isn’t just a design detail. It impacts a few things:

    • Visual impact: More thread = richer, fuller look.

    • Durability: More thread can add thickness and strength.

    • Cost: Higher coverage means more thread, more stitching time, and usually, a higher price.

    • Turnaround time: Complex patches take longer to produce.

    Choosing the right coverage can save you money, or make your patch pop. Or both.

    When to Go with 50% Coverage

    Best for: Simple logos, light text, small designs

    Let’s say you’re ordering patches with a short message and maybe a small graphic, like a name tag or basic logo. That’s a good fit for 50%.

    You’ll have the design stitched over the base fabric, which stays visible in the background. It keeps things simple and neat.

    Why it works:

    • Cheaper than full coverage

    • Faster to produce

    • Clean, minimal look

    Watch out if:

    • Your design has lots of color or detail

    • You want a bold, “wow” effect

    This option is all about subtlety and savings. If you’re tight on budget or like minimal design, 50% has your back.

    So, now as you know a bit about patch coverage have a gaze on Top 5 Trending Custom Embroidered Patch Designs You’ll See Everywhere in 2025.

    When 75% Coverage Is the Sweet Spot

    Best for: Detailed logos, medium-size text, colorful elements

    This is the middle ground. You get the texture and punch of embroidery without going all-in.

    You’ll still see bits of the fabric base, but most of the design area will be covered. This balance keeps costs lower while still offering great visuals.

    Why it works:

    • More depth and color

    • Enough stitching to bring your design to life

    • Less cost than full coverage

    Watch out if:

    • You want a patch that feels premium

    • Your design has a complex background or gradient

    75% coverage is great for most business logos, uniforms, or merch. It’s the “just right” of embroidery.

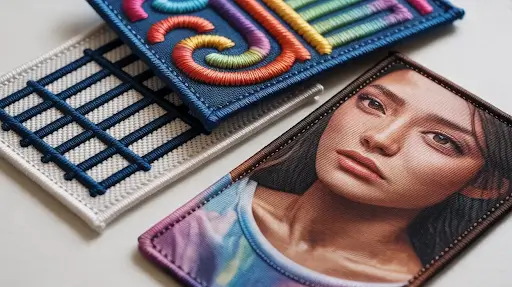
    Three embroidery patches arranged on a clean, white linen surface.


    When 100% Coverage is Worth It

    Best for: High-end branding, bold patches, showpieces

    If you’re going for full effect, eye-popping, high-contrast, professional-looking patches, this is the one.

    With every inch covered in thread, your design stands out. These patches feel thicker and often last longer because they’re reinforced with all that stitching.

    Why it works:

    • Total design control

    • Premium texture and color saturation

    • Looks and feels expensive

    Watch out if:

    • You’re trying to save money

    • Your design is super simple

    100% coverage is ideal for jackets, caps, club gear, or brand merch where visuals really matter.

    How to Choose the Right Base Fabric

    Coverage and fabric work together. If your design uses lower coverage, the base fabric becomes part of the design. So you’ll want one that looks good on its own.

    For 50% or 75%, go with a fabric color that complements your design.

    For 100%, it doesn’t matter much, you won’t see the fabric at all.

    What’s the Price Difference?

    Here’s a rough idea:

    • 50% Coverage: Budget-friendly. Least thread, shortest production time.

    • 75% Coverage: Mid-tier price. More thread, still manageable turnaround.

    • 100% Coverage: Highest price. Max thread, longest production time.

    But it’s not always a huge jump. Especially when ordering in bulk, the per-unit cost difference between 75% and 100% may be smaller than expected.

    Might be interested in knowing Top Embroidered Patches Ideas to Upgrade Any Item.

    Design Examples to Help You Decide

    • 50% Coverage
      Good: Name patches, event tags, simple logos
      Not good: Multicolor artwork or tiny fonts

    • 75% Coverage
      Good: School mascots, brand logos, staff uniforms
      Not good: Hyper-detailed or photo-like designs

    • 100% Coverage
      Good: Statement patches, biker back patches, merch branding
      Not good: Small or budget projects

    What About Patch Size?

    The bigger the patch, the more coverage matters.

    A 3″ circle with 100% coverage? Looks rich.
    A 10″ back patch with 100% coverage? That’s a production beast, and it’ll cost more too.

    Balance size and coverage based on where the patch will be worn and what impression you want it to make.

    Can You Mix Coverage Types in One Order?

    Not exactly.

    Each design needs its own setup. So if you want 100% coverage for a back patch and 50% for a name tag, they’d be treated as separate products.

    But ordering them together can still help with overall pricing and shipping.

    Our Take (And What We Recommend Most)

    At Patch Makers UK, we see 75% coverage hit the sweet spot most often. It gives you enough thread to show off your design without maxing out your budget.

    That said, if you’re going for a standout piece, or branding is key, 100% is absolutely worth it.

    And if it’s a basic tag or simple ID patch? 50% is all you need.

    FAQs

    Q: Will 50% coverage look cheap?

    A: Not at all, if your design fits the format. Simple text or logos look clean and pro with partial stitching.

    Q: Is 100% embroidery harder to sew on?

    A: Not really. It may feel a bit thicker, but it sews just like any other patch.

    Q: Can I get a sample before I commit?

    A: Absolutely. Patch Makers UK offers free mockups and sample options so you can see before you buy.

    Q: Does higher coverage mean it’ll last longer?

    A: Slightly, yes. More stitching means more durability, but all our patches are made to last.

    Match Coverage to the Job

    Choosing the right embroidery coverage isn’t about what’s “best.” It’s about what’s best for your patch.

    Keep it simple for basic jobs. Go bold for premium branding. Or land in the middle with 75% for a strong balance.

    Need help deciding? Our team at Patch Makers UK can guide you, mock up options, and help you get exactly what you want, no guesswork.

    Prepared to create a patch that fits your style and your budget? Start Your Order Now!

  • Top Embroidered Patches Ideas to Upgrade Any Item

    Top Embroidered Patches Ideas to Upgrade Any Item

    Boring clothes, dull accessories, and plain household items don’t stand a chance when embroidered patches come into play. These tiny pieces of stitched art pack a punch of personality and give you full creative freedom. 

    From street fashion to home décor and everything in between, embroidered patches are no longer just for scouts or bikers, they’ve become the most versatile and artistic add-ons anyone can use.

    In this blog, we’ll explore what to do with embroidered patches, where to place them, and how to use them in fresh, inspiring ways. Whether you’re into fun patches for clothes, planning to make patches for bags, or searching for creative ways to display patches, we’ve got every idea stitched together just for you.

    Sprucing Up Clothing with Embroidered Patches

    Patch Ideas for Jackets and Denim

    Jackets and jeans are a timeless playboard for patch ideas. You can create a complete visual story using iron on patch ideas, think travel patches for a backpacker vibe, or music-themed artistic patches for a rock-n-roll edge.

    Patch design ideas for clothing include layering different sizes, playing with colours, or arranging patches in a specific shape. Want a standout look? Go bold with oversized custom patches on the back of a denim jacket.

    Revamp T-Shirts and Hoodies

    If you’re wondering what can I put patches on, start with a basic tee or hoodie. Use embroidered patch ideas to add flair to the chest, sleeve, or even the hem. Ideas for iron on patches here include quotes, initials, or trendy motifs that reflect your mood or message.

    Hoodies offer ample space to use custom patch maker skills, add patches to the hood, pocket edges, or sleeves to create an elevated streetwear look.

    A look into: Ways For Creating Unique Custom Embroidered Name Patches

    Turning Accessories into Glory

    What to Put Embroidered Patches On – Bags and Backpacks

    Looking for things to put patches on that you carry every day? Tote bags, messenger bags, and backpacks are perfect. These items become conversation starters when you apply creative patches that reflect your personality, think flags, bands, hobbies, or your initials in personalized patches.

    Iron on patches ideas for bags:

    • Symbols of your favourite destinations
    • Icons representing your passions (books, animals, tech)
    • Custom logos created via a trusted patch creator

    Transform Hats, Caps, and Beanies

    If you’ve ever asked what do you put patches on to spice up an outfit with minimal effort, hats and caps are the answer. A single patch on the front of a snapback or a side of a beanie instantly makes it pop.

    Choose patch styles that are compact but eye-catching. A classic round logo, a flag, or a quote patch can be enough to amplify a basic hat into a fashion-forward piece.

    Touchup to Everyday Items

    Decorate Your Phone Case

    Want to know what to do with iron on patches without actually ironing them? Slip them between your phone and a transparent phone case. This lets you showcase your patch without any permanent application.

    Embroidery patch ideas for phone cases include emojis, abstract designs, or initials. The best part? You can change the patches out whenever you want a new look.

    Creative Things to Put Patches On – Keychains and Lanyards

    Make your keys or lanyards uniquely yours by attaching mini embroidered patches to them. It’s a subtle, affordable, and stylish way to carry a symbol of your identity every day.

    If you’re still pondering what can you put patches on besides fabric, keychains are a clever hack. Just grab a patch, glue or stitch it to a blank tag, and voila, custom swag on the go.

    Home Décor Gets a Makeover

    What to Put Patches On – Cushions and Pillow Covers

    You don’t need to redecorate an entire room. Just sew or iron embroidered patches onto throw pillows or cushions for a custom look. Think fun patches for clothes? Now apply the same style logic to your sofa.

    Iron on patch ideas for home décor:

    • Floral motifs for a boho vibe
    • Monograms for a personal touch
    • Pop culture icons for a playful twist

    Lampshades and Fabric Art

    If you’re into DIY or handmade interiors, lampshades are a unique place to apply creative patches. Use reflective threads or metallic patches to create visual interest under the glow of a lamp.

    You can also build your own fabric wall hangings to show off your growing patch collection. It’s one of the most unique ways to display patches plus, it lets you switch out or rearrange pieces whenever you like.

    Express Your Story Creatively

    Turn Patches into Jewellery

    Yes, you read that right. Patches can become wearable art in the form of pendants, earrings, or bracelets. All it takes is a little ingenuity and some basic craft tools.

    Things to do with patches here include:

    • Framing a mini patch inside a pendant locket
    • Creating fabric bangles with stitched-in patches
    • Turning oversized patches into brooches or pins

    This is a great use of leftover or extra patches you may not want to sew permanently onto clothes.

    A visual of various items with embroidered patches.

    Unique Ways to Display and Collect Patches

    Shadow Boxes and Patch Boards

    Ask any seasoned collector and they’ll tell you that the best way to display patches is in shadow boxes. This protects your collection from dust while creating a focal point for any room.

    Alternatively, hang a fabric board in your workspace or bedroom. Velcro or pin your patches to it, it’s a flexible, artistic way to show off your collection and rotate patch styles over time.

    Customize Event Apparel and Uniforms with Embroidered Patches

    What Can You Put Patches On for Events?

    Hosting a fundraiser, family reunion, or company retreat? Personalized embroidered patches can instantly unify a group and add a professional touch. Apply them to T-shirts, caps, aprons, or even tote bags for a coordinated yet creative look.

    Think custom patches with names, logos, slogans, or event dates. These not only serve as wearable branding but also double as keepsakes. You can even create patches ideas for jackets as limited-edition memorabilia.

    Create Branded Workwear

    Branded patches are a powerful yet low-cost way to upgrade work uniforms. If you’re running a coffee shop, bookstore, or home services business, use iron on patch ideas or sew-on designs on aprons, hats, or shirts. This creates a polished look without the need for expensive custom printing.

    A professional custom patch maker can help translate your logo into a durable, embroidered piece, perfect for promoting your identity wherever your team goes.

    Patches as Personalized Gifts and Memorabilia

    Creative Patch Ideas for Gifting

    Still unsure what to do with patches that you haven’t used? Turn them into unique gifts! Gift a patch collection to a friend who travels, loves fashion, or enjoys handmade art.

    You can also:

    • Include a patch in a birthday card
    • Add patches to a scrapbook
    • Give iron-on patches alongside a plain tote or T-shirt for a DIY project

    These are thoughtful, budget-friendly gift ideas with a creative edge.

    Turn Travel Memories into Patches

    If you’ve been wondering what to do with travel patches, try stitching them onto a fabric map, tote bag, or scarf. Travel patches can represent cities visited, festivals attended, or favorite hiking trails conquered.

    This creates a patch journey, a living memory stitched in thread. You can even use custom embroidered patches to represent places not typically found in souvenir shops.

    Upcycle Old Clothing with Patch Design Ideas

    What Can You Put Embroidery Patches On That’s Already in Your Closet?

    Don’t toss that old shirt or those worn-out jeans just yet. Patches can cover stains, holes, or fading fabrics while also adding flair. This approach is both sustainable and stylish, giving garments a second life.

    Use patches ideas to:

    • Cover elbows on jumpers
    • Reinforce knees on kids’ trousers
    • Add fun graphics to faded tees

    By doing this, you’re reducing waste and injecting your wardrobe with personality at the same time.

    Incorporating Artistic Patches in DIY Projects

    Unique Ways to Display Patches in Crafts

    Need ideas for patches in your next craft session? Try integrating patches into handmade bookmarks, fabric journals, or DIY pencil cases. These smaller items offer a lot of room for creativity without requiring advanced sewing skills.

    Create personalized patches with initials or inspiring quotes, and apply them using glue or stitching. It’s a great way to experiment with patch placement and test out patch styles on a small scale.

    Trending: Top 5 Custom Embroidered Patch Designs You’ll See Everywhere in 2025

    Frequently Asked Questions About Embroidered Patches

    What are some things to put Embroidered patches on besides clothes?

    Try them on tote bags, caps, lampshades, notebooks, phone cases, lanyards, and even water bottles with adhesive backings.

    What is the best way to display Embroidered patches?

    Use shadow boxes, patch boards, or fabric banners for display. These options allow you to rotate and reorganize your patch collection while protecting them from wear.

    Can I iron on Embroidered patches to any fabric?

    Not all fabrics handle heat the same way. Cotton and denim are perfect for iron-ons, but for delicate materials, opt for sew-on or adhesive patches to avoid damage.

    What are some unique ways to use travel Embroidered patches?

    Create a patch travel map, stitch patches onto a travel backpack, or display them in a framed memory board. Each one marks a place, a memory, and a moment in time.

    Where can I get custom embroidered patches made?

    For premium, creative, and durable custom patches, work with a professional patch creator or custom patch maker like Patch Makers UK.

    Make Your Style Speak with Every Stitch

    Your creativity doesn’t have to be confined to paper or screen. With embroidered patches, you can wear your imagination, decorate your space, or personalize everyday items in ways that are meaningful, fun, and entirely unique to you.

    At Patch Makers UK, with an array of patch styles including iron-on, sew-on, chenille, woven, and sublimated options, we’re your go-to custom patch maker in the UK. Start creating with Patch Makers UK today, where ideas turn into iconic patches.

  • How To Make & Attach Custom Embroidered Patches To Velvet

    How To Make & Attach Custom Embroidered Patches To Velvet

    There’s something undeniably royal about velvet—the soft sheen, the rich texture, the instant elevation of anything it touches. But here’s the twist: pair that timeless fabric with custom embroidered patches, and you’ve got a fashion-forward combo that screams personality and class in equal measure.

    Whether you’re designing a velvet patch for your band jacket, adding flair to your accessories, or just experimenting with some embroidery patch styles, this combo is where style meets texture.

    Now, we know what you’re thinking: can you embroider velvet without messing up its plush feel? Yes, you can. And not just that—you can also learn how to remove a sewn on patch and reattach it the right way, all while preserving the elegance of your velvet gear.

    How To Make Eye-Catching Embroidered Patches for Velvet

    Before you dive into pinning a patch on your velvet jacket, you’ll need to create the patch itself. Whether you’re a DIY warrior or you’re ready to buy embroidered custom patches from a top-rated embroidered patch service in the UK, this step is where all the magic begins.

    Step 1: Gather Your Embroidery Supplies

    Start with the essentials:

    • Blank cotton or twill fabric (a better base than velvet for stitching)
    • Your patch design or template
    • An embroidery machine for patches or needle and embroidery thread
    • Embroidery stabiliser
    • Embroidery hoop
    • Scissors
    • Iron-on adhesive (for easy attachment later)

    For those leaning toward DIY, having a blank embroidery patch to work on makes life easier. Alternatively, ordering from a custom embroidered patches UK supplier can save time and offer more polish.

    Step 2: Choose Your Patch Style and Design

    There’s no shortage of patch styles, from embroidered name patches to logos, quotes, symbols, or artsy icons. Choose a design that complements the elegance of velvet. You can opt for:

    • Personalised embroidered patches for school uniforms or company apparel
    • Custom embroidered badges for collectors or club jackets
    • Embroidery logo patches for branding your own merch

    Don’t forget: when you go the custom route, custom embroidered patches no minimum is a bonus that many UK suppliers offer. That means more flexibility in your creative journey!

    Step 3: Begin the Embroidery Process

    Secure your patch fabric in an embroidery hoop, lay a stabiliser beneath, and use either a hand-stitch method or a custom embroidery machine. For those new to this, machines are great for precision, especially if you’re looking into wholesale embroidery patches.

    When stitching your design:

    • Keep thread tension even
    • Stick to clean outlines for logos or text
    • Fill large spaces using satin or fill stitch for bold visibility

    Once complete, cut out the patch with about a 2-3mm border.

    Step 4: Attach Backing to Your Patch

    Apply an iron-on adhesive sheet to the back of your patch for easy application. This step is crucial especially when dealing with velvet, as direct stitching can crush the fabric’s pile.

    With your patch ready, let’s shift gears to the velvet side of things.

    How To Attach Embroidered Patches To Velvet Fabric

    Now that you’ve created your custom embroidery patch, let’s talk velvet. From bags and shoes to jackets and caps: can you embroider on velvet directly? Technically yes, but it’s risky. Velvet is prone to marks and pressure damage. Instead, applying your patch separately and then adhering it to the velvet is your best move.

    Step 1: Prep the Velvet

    Lay your velvet garment flat on a clean surface. Use tailor’s chalk or disappearing ink to mark where you’d like the patch to go. This helps avoid misalignment when it’s time to press or sew.

    Tip: Always test on a scrap piece first if you’re working with a brand new or delicate velvet item.

    Step 2: Position and Pin the Patch

    Place your finished embroidered patch custom on the marked area and pin it gently in place. Avoid pulling or stretching the velvet during this step.

    Pick the Best: Embroidered vs Sublimation vs Woven Patch

    Step 3: Choose Between Heat or Stitch

    Depending on the patch backing, you’ve got two solid options:

    Option A: Iron-On Method (For Heat-Sensitive Patches)

    • Set your iron to medium heat (no steam!)
    • Place a pressing cloth over the patch
    • Hold the iron down for 10–15 seconds
    • Let it cool completely

    This method is clean, easy, and perfect for velvet as long as you’re gentle. It’s also ideal for people searching custom embroidery patches online with adhesive backings.

    Option B: Hand Stitching (For Long-Lasting Hold)

    If you prefer something more permanent:

    • Use a curved needle for easier sewing
    • Select matching thread colour
    • Take small whip stitches or backstitches around the patch

    This method is especially useful for:

    • Embroidered badges near me you want to reuse
    • People curious about how to remove a sewn on patch later with minimal damage

    Attaching custom embroidered patches to velvet fabric

    Velvet-Friendly Tips For Patch Lovers

    Whether you’re adding custom hat embroidery, upgrading a velvet bag with embroidered badges custom UK, or reusing patches on jackets or jumpers, here are a few bonus tips to make your work last longer.

    Use Light Pressure

    Velvet bruises easily. Always use light pressure while ironing or stitching.

    Avoid Stretching

    Never pull the velvet while sewing. Let it sit naturally to prevent distortion.

    Always Patch Before Washing

    Apply your custom embroidered patches before the first wash to test adhesive or thread strength.

    Add Final Touches For a Clean Finish

    Once your custom embroidered patch is secured to the velvet—either by iron-on adhesive or stitching—it’s time for some cleanup and polish.

    Step 4: Press Gently To Set the Patch

    If you’ve stitched your patch, take a low-heat iron, place a clean cloth over the area, and gently press. This sets the stitches and removes any wrinkles. Be cautious, velvet is delicate and can scorch or flatten under high heat.

    Pro Tip: Use a velvet board or thick towel underneath to preserve the fabric pile while ironing.

    Step 5: Conceal the Threads (If Sewn)

    For those who opted for stitching:

    • Pull the final thread through the back side of the velvet
    • Tie a discreet knot
    • Thread it a few millimetres away under the surface and trim close

    This keeps your embroidery name patch looking clean, neat, and professional from all angles.

    Might love: History of Embroidered Patches That Shaped Fashion & Identity

    How To Remove a Sewn-On Patch Without Damaging Velvet

    Ever changed your mind about placement? Or want to reuse your personalised embroidered patches? You’re not alone. Here’s how to remove a sewn-on patch safely from velvet.

    Step 1: Flip The Garment Inside Out

    Locate the stitches and gently stretch the fabric to reveal the thread paths. Be careful not to stress the velvet.

    Step 2: Use a Seam Ripper

    With a steady hand, insert a seam ripper under each stitch. Remove one stitch at a time to avoid snags or holes in the velvet.

    Step 3: Remove Residue or Loose Threads

    Once the patch is removed, clean the surface. If adhesive residue is left behind from an iron-on patch, dab with a gentle adhesive remover that’s velvet-safe, then blot dry with a soft towel.

    Want a shortcut? Choose custom embroidered patches no minimum, so you can always keep backups on hand for different looks.

    Why Velvet + Embroidery Patches Are The Perfect Match

    From a visual standpoint, velvet’s natural elegance pairs beautifully with the bold textures and colours of embroidery patches custom. Whether you’re working on a fashion-forward hoodie, a vintage shoulder bag, or a pair of velvet sneakers, there’s no limit to the ways you can express your personality through embroidered patches UK style.

    Velvet Fashion Use-Cases:

    • Velvet bomber jackets with embroidered logo patches
    • Velvet tote bags adorned with custom patches
    • Velvet caps topped with embroidered badges custom UK
    • Velvet trainers with unique patches and emblems

    Whether you’re stitching up a storm at home or searching “embroidered badges near me” to find a professional touch, this trend isn’t slowing down anytime soon.

    Add Personality to Your Velvet with Patch Makers UK

    Velvet is no longer just a luxurious material, it’s your blank canvas for creativity. When paired with the right embroidered patches, it becomes a storytelling tool for your wardrobe, your brand, or your personality.

    Whether you’re repping your business with custom embroidered badges, personalising your daily look with embroidery name patches, or simply experimenting with blank patches for embroidery, there’s a world of style at your fingertips.

    So why wait? Whether you’re a fashion student, designer, artist, or style rebel, Patch Makers UK has all the tools you need to bring your velvet pieces to life.

    All set to groom your style? Explore our full range of top-quality custom embroidered patches and start creating today with Patch Makers UK. No minimums. Just maximum impact.

  • Pick the Best: Embroidered vs Sublimation vs Woven Patch

    Pick the Best: Embroidered vs Sublimation vs Woven Patch

    If we talk about modern patch styles, we’re no longer limited to the classic embroidered crest. From high-detail sublimation patches to clean and flat woven options, the choice isn’t always straightforward. So, how do one know which patch style is right for the needs?

    Let’s break it all down: Embroidered vs Sublimation vs Woven Patches, and get to the bottom of what truly sets them apart.

    All Time Classic: What Are Embroidered Patches?

    Embroidered patches have been around for decades, and they’re what most people picture when they think of traditional patches. They’re made using threads stitched into a twill fabric backing, offering a slightly raised texture and that classic, tactile feel.

    Key Features of Embroidered Patches

    • Textured look: The raised threads give a 3D, handcrafted vibe.
    • Bold colours: Vibrant embroidery thread stands out well on twill.
    • Heritage appeal: Think vintage biker patches or military insignias.

    These are great for logos, emblems, and badges that don’t need too much fine detail. When it comes to embroidered vs woven patches, embroidery wins for a more rugged, traditional look.

    But what if you need a patch that’s crisp, clean, and flat? That’s where woven patches come in.

    Woven Patches: Finer Detail, Smoother Finish

    Woven patches use thinner threads than embroidered ones, which allows for tighter weaves and finer details. This style is perfect when you’re aiming for clarity over texture.

    Woven Patch vs Embroidered Patch: What’s the Real Difference?

    • Detail: Woven patches can include small text and intricate graphics that would blur on an embroidered crest.
    • Finish: Flat and smooth, ideal for a modern aesthetic.
    • Durability: Less prone to snagging due to the flatter weave.

    When deciding between woven vs embroidered patches, think about the level of detail your design requires. Woven patches UK are particularly popular for corporate branding, minimalist logos, and school badges where legibility matters.

    Overview: History of Embroidered Patches That Shaped Fashion & Identity

    Difference Between Woven and Embroidered Patches

    To summarise:

    • Embroidered = bold, textured, traditional.
    • Woven = smooth, detailed, modern.

    So if you’re after detail-rich personalised patches for your brand, woven patches may be the better bet.

    The Modern Twist: Sublimation Patches

    Ever seen a patch with a photo-quality print on it? That’s probably a sublimation patch. This technique uses heat to fuse dye directly into the patch fabric, allowing for vivid colours and ultra-high-definition designs.

    What is a Sublimated Patch?

    A sublimated patch is essentially a printed patch, created by transferring ink into the fabric’s fibres using heat and pressure. The result? A completely smooth surface with no threads, stitches, or texture, just pure image clarity.

    Sublimation vs Embroidery: Key Differences

    • Detail: Sublimation outshines embroidery for photographic or gradient-rich designs.
    • Texture: Embroidery is raised; sublimation is flat.
    • Production Time: Sublimation is generally faster for bulk orders.

    The sublimated patch vs embroidered patch debate really boils down to aesthetics vs tradition. Do you want crisp photographic imagery or that authentic stitched finish?

    Printed Patches vs Embroidered: Which One Lasts Longer?

    When it comes to printed patches vs embroidered, durability can be a concern. While sublimation patches won’t fade quickly if cared for, embroidered patches tend to withstand wear and tear a bit better over time, especially with frequent washing or exposure to the elements.

    That said, the difference between embroidery and woven patches or sublimated styles isn’t always about longevity. It’s about what makes your design pop. Patch vs embroidery is a battle of image clarity vs textured feel.

    Embroidery vs Patch: Confused Yet?

    Let’s simplify it:

    • Direct embroidery vs patch: Direct embroidery is stitched straight into the fabric (e.g., a polo shirt), making it permanent but less flexible. Patches can be transferred, reused, or gifted.
    • Embroidery vs patch: Embroidery = permanent; patch = portable branding.
    • Felt patch vs embroidered patch: Felt adds softness, while embroidery adds texture.

    Patches offer customisation and removability. Embroidery is best when permanence is the priority. It’s a matter of function and flexibility.

    An embroidered, sublimation, and woven patch

    Comparing Custom Patch Styles: When to Choose What?

    Let’s say you’re designing custom patches for your sports club, business uniforms, or fashion line. Here’s a simple guide:

    Go for Embroidered Patches if:

    • You want a timeless, vintage or military look.
    • Your design is bold with clean shapes.
    • Texture and visual depth matter.

    Choose Woven Patches if:

    • Your logo has fine text or intricate lines.
      You want a smooth, modern finish.
    • You’re printing in bulk for school or workwear.

    Pick Sublimation Patches if:

    • Your design includes gradients, shadows or photos.
    • You need edge-to-edge colour.
    • Speed and clarity are your priority.

    Breaking Down Patch Types by Use Case

    To make your choice easier, let’s look at some common scenarios and see how each patch style stacks up.

    1. For Uniforms and Workwear

    When it comes to durability and professionalism, embroidered patches are a classic. They can handle rough use and repeated washing, making them ideal for security services, hospitality staff, and military uniforms.

    However, woven patches are growing in popularity for corporate workwear because they offer a sleeker, more refined finish, especially for detailed logos. They also look great on suits and softshell jackets where bulkier embroidery might seem too rugged.

    Verdict: Choose embroidered or woven patches depending on the texture vs detail balance you prefer.

    2. For Fashion and Streetwear Brands

    This is where sublimation patches shine. Whether you’re creating high-fashion collaborations or drops for a streetwear label, sublimation offers full-colour detail, smooth edges, and a photo-like finish. Think patches featuring artwork, pop culture references, or bold photographic imagery.

    Still, woven patches are also a strong contender here—especially when you want minimalist logos with a clean, modern look. They give off a higher-end vibe without going overboard on texture.

    Verdict: For high colour impact, go with sublimation. For subtle sophistication, go woven.

    Must read: How Woven Patches Are Revolutionizing Fashion Trends in the UK

    3. For Clubs, Events, and Collectibles

    Custom patches are perfect for clubs, reunions, and events. If you’re designing a patch for a scout group, biking club, or even a comic con, the texture of embroidered patches can feel nostalgic and collectible.

    But if your design involves lots of tiny details, small lettering, or requires high legibility, a woven patch is better suited. For pop art, graphics, or photo prints, sublimation patches offer the best canvas.

    Verdict: Choose based on your artwork. Embroidery for heritage appeal, woven for clarity, sublimation for impact.

    Woven vs Embroidered Patches: Debunking Myths

    It’s easy to think woven vs embroidered patches are nearly the same, but they serve very different purposes.

    Here are some common misconceptions:

    • Myth: Woven patches are just “flatter” embroidered patches.
      Truth: Woven uses thinner threads and a tighter weave to show more detail—not just less texture.

    • Myth: Embroidery always looks better.
      Truth: That depends. If you want crisp lines or tiny text, woven patches will outperform embroidery in clarity.

    • Myth: Woven patches are less durable.
      Truth: Both woven and embroidered patches are highly durable when properly sewn or heat-applied. It depends more on the backing and placement than the patch type itself.

    So if you’ve been torn between woven vs embroidered patch styles, remember it’s not a quality debate, it’s all about design intention.

    Sublimated vs Embroidered: Is There a Clear Winner?

    When comparing sublimated patch vs embroidered patch, the right choice depends entirely on your needs:

    • Want to recreate complex art, illustrations, or gradients? Sublimated patches are your best friend.
    • Need a tactile, stitched finish with a vintage or military edge? Stick with embroidered patches.

    In the battle of sublimation vs embroidery, there’s no one-size-fits-all winner. But you do need to match the technique to the visual goals of your design.

    And let’s not forget cost efficiency. Sublimation embroidery (or rather, sublimated patches) can be more cost-effective for bulk runs with intricate designs, because there’s no setup required for threads or stitch paths.

    Direct Embroidery vs Patch: Why Patches Are More Flexible

    A final note on direct embroidery vs patch, while direct stitching might seem like a simpler option, it locks your design into one garment forever. If there’s a mistake, you can’t fix it. If your branding changes, you’re stuck.

    With custom patches, you get flexibility:

    • Apply to different garments.
    • Reuse or reposition.
    • Sell or trade (perfect for merch!).

    So whether it’s embroidered, woven, or sublimation patches, using patches instead of direct embroidery is often a smarter, more brand-flexible move.

    What’s the Right Patch for You?

    By now, you should have a clear idea of the difference between woven and embroidered patches, how sublimation vs embroidery plays out, and when to go for printed patches vs embroidered ones. Choosing the right patch isn’t just about looks, it’s about purpose, audience, and long-term branding goals.

    Here’s a final cheat sheet:

    Patch Style Best For Texture Detail Durability Best Use
    Embroidered Classic logos, vintage style Raised Moderate Excellent Uniforms, clubs
    Woven Small text, clean lines Flat High Excellent Fashion, corporate
    Sublimation Photos, full-colour art Flat Photo-quality Good Merch, creative fashion

    Your Patch, Your Way – Start with Patch Makers UK

    Doesn’t matter, if you’re designing a custom embroidered crest, a sleek woven logo, or a full-colour sublimation patch, Patch Makers UK is your go-to source for personalised patches with top-tier quality and expert support.

    Need help deciding between embroidered vs sublimation vs woven patches? We’ll guide you from design to delivery, making your branding bold, beautiful, and unforgettable.

  • History of Embroidered Patches That Shaped Fashion & Identity

    History of Embroidered Patches That Shaped Fashion & Identity

    Somebody have ever thought how a humble stitch transformed into a global symbol of identity, rebellion, and artistry? Custom embroidered patches may seem like a modern trend—sported by fashionistas, military personnel, or even your local Scout group—but in truth, these intricate little badges of meaning have travelled through time and empires, telling stories thread by thread.

    From ancient royalty to rock bands, from military uniforms to everyday high-street fashion, embroidered patches have left their mark—quite literally. And here in the UK, we’ve had a front-row seat to this transformation.

    Let’s disclose the fascinating journey of custom embroidered patches, tracing their heritage, evolution, and how they’ve become an indispensable tool for both personal expression and professional branding.

    The Origins of Embroidered Patches

    Ancient Beginnings: Where Threads Spoke Louder Than Words

    Long before the invention of machines or modern custom patch creators, embroidery patches were lovingly crafted by hand in cultures as early as ancient China and India.

    In these civilisations, embroidered patches were powerful symbols of status and wealth. Only the elite could afford such detailed, time-intensive designs. Rich silks and gold threads stitched into robes and uniforms marked one’s place in society.

    By the time embroidery made its way into Europe, particularly during the medieval period, the art had taken on both religious and noble associations. In churches and among royalty, embroidered crests, names, and ornate borders became signs of lineage, faith, and rank.

    Have a glance: The Evolution of Custom Patches – From Military to Fashion

    A British Stitch in Time

    In the UK, embroidery gained prominence during the Tudor and Elizabethan eras. Lavish court costumes featured elaborate embroidered elements, many of which mimicked what we now call embroidered name patches or custom embroidered iron-on patches—though back then, of course, they were all painstakingly hand-sewn.

    Embroidered Patches in Military History

    Stitching Honour, Rank & Regiment

    Nowhere has the influence of custom embroidered patches UK been more enduring than in the military. The British Armed Forces, alongside other nations, began using embroidered military patches to signify rank, unit, and service branches.

    Dating back to the 19th century and reaching peak usage in World Wars I and II, embroidered patches were often sewn directly onto uniforms. These patches made identification easier and gave soldiers a strong sense of belonging and pride.

    Even today, embroidered Velcro patches UK are a common sight in the armed forces, allowing for versatility and easy replacement during missions. For veterans and collectors alike, military patches are powerful emblems of service, bravery, and sacrifice.

    From Punk to Popular: Embroidered Patches in UK Fashion

    A Rebellious Resurgence

    Post-WWII, embroidery found its way into the heart of fashion—and nowhere did it shine brighter than in Britain’s music and punk scenes.

    In the 1970s and ’80s, embroidered patches for clothes became statements of rebellion. Think denim jackets plastered with custom embroidered name patches, iron-on band logos, and one-off designs with punchy slogans.

    From the Sex Pistols to The Clash, the punk generation embraced patch styles as a way to stick it to the establishment and stand out in a crowd.

    Today, that rebellious spirit lives on. While high-street retailers now offer embroidered stick-on patches and sew-on embroidered patches as fashion staples, the true magic still lies in personalised embroidered patches UK, designed to say something unique about the wearer.

    The Rise of Customisation: Patches in the Modern Day

    The Shift to Custom Patch Creators

    Thanks to the rise of custom patch creators and custom patch factories, anyone—from small businesses to school clubs—can buy patches online or make embroidered patches tailored to their exact vision. The process is faster, more accessible, and offers no minimum orders, making embroidered patches custom no minimum a popular option across the UK.

    Whether you’re looking to design embroidered logo patches for your brand, personalised embroidered name patches UK for a school event, or even custom embroidered patches near me for your band merch—there’s a patch out there for every purpose.

    A collection of embroidered patches with various designs

    Types of Custom Embroidered Patches in the UK

    From Classic to Contemporary

    The diversity of patch styles available today is impressive. Let’s explore some of the most popular options in the UK patch scene:

    1. Iron On Embroidered Patches

    Ideal for ease and speed. Simply place, press, and wear. Popular for uniforms, school kits, and casual fashion.

    2. Sew-On Embroidered Patches

    These offer more durability and a traditional feel. Often used on jackets, bags, and workwear.

    3. Velcro-Backed Patches

    Favoured by military personnel, airsoft teams, and emergency services. These embroidered patches with Velcro offer flexibility and removability.

    4. Embroidered Logo Patches

    Perfect for brands, bands, and businesses who want to make a bold, stitch-perfect impression.

    5. One-Off Embroidered Patches

    For one-time events, niche campaigns, or collector’s items, one-off embroidered patches UK provide unique, limited-run identity markers.

    How to Make Embroidered Patches: The UK DIY Craze

    The appetite for crafting has grown massively in the UK over recent years, and embroidered patches custom are right in the heart of that creative boom.

    Cresting Your Own Embroidered Patch

    Curious about how to make embroidered patches? While many opt to buy patches online, there’s a thriving DIY community that prefers the handmade route. Here’s a simple outline:

    1. Design Your Patch – Sketch it digitally or by hand.
    2. Choose Your Base Fabric – Felt or twill are common choices.
    3. Secure Your Backing – Iron-on, Velcro, or plain.
    4. Stitch the Design – Use an embroidery hoop and machine or stitch by hand.
    5. Finish the Edges – Merrowed edges or a satin stitch will give it a professional look.

    If crafting’s not your thing, no worries — plenty of UK-based custom patch creators can bring your vision to life with professional finishings.

    Know the tips: Ways For Creating Unique Custom Embroidered Name Patches

    Embroidered Patches for Clothes: Beyond Decoration

    The beauty of embroidered patches for clothes is in their versatility. Whether you’re adding flair to your denim jacket or patching a worn elbow with personality, these stitched accessories do more than decorate.

    Why Brits Love Embroidered Patches on Apparel

    • Sustainability: Patching up clothes instead of throwing them away? That’s peak eco-conscious living.
    • Personalisation: Turn basic wardrobe pieces into conversation starters.
    • Uniform Identity: Ideal for schools, workplaces, or clubs who want to add subtle branding.

    No wonder embroidered patches UK continue to be an affordable, stylish solution across generations.

    From Scotland to Southampton: Patches Across the UK

    Whether you’re hunting for embroidered patches Scotland or a small-run batch in Birmingham, the demand for custom embroidered patches UK spans the entire map.

    Patch-making isn’t limited to large corporations anymore. With services offering custom embroidered patches no minimum UK, you can order one piece or a thousand. Whether you’re an indie designer, a youth group, or a local football club, there’s a patch solution waiting for you.

    And if you’re Googling custom embroidered patches near me, chances are, Patch Makers UK is just the team you’ve been looking for.

    Embroidered vs Woven Patches: What’s the Difference?

    It’s a common question — should you go for embroidered or woven?

    • Embroidered patches have that signature raised, textured look. They’re traditional, tactile, and ideal for bold designs.
    • Woven patches, on the other hand, use thinner threads for finer details and a flatter finish. Perfect for intricate logos or small text.

    If you’re after that classic, premium finish that stands the test of time, you really can’t go wrong with custom embroidered patches iron on or sew-on options.

    Final Stitch

    From ancient emperors to high-street fashionistas, custom embroidered patches have stitched their way through history and into our wardrobes, workplaces, and everyday lives.

    So whether you’re starting a clothing brand, celebrating an event, or simply want to express your unique self — don’t settle for stock designs. Choose custom. Choose quality. Choose Patch Makers UK. Order your bespoke patches now.

  • Ways For Creating Unique Custom Embroidered Name Patches

    Ways For Creating Unique Custom Embroidered Name Patches

    Think of a plain piece of cloth changing into a representation of a company, personal identity, or self-expression. Custom embroidered name patches are exactly that.

    If you want to add a personal touch to your apparel, advertise a company, or infuse creativity into your accessories, these patches provide a stylish solution that is both creative and practical.

    But how do you create custom embroidered name patches that stand out? Let’s explore the best techniques, materials, and methods to craft stunning name patches tailored to your needs.

    What Are Custom Embroidered Patches and How Are They Used?

    Custom embroidered patches are fabric pieces with stitched designs that feature names, logos, or patterns. They are created using embroidery machines that intricately weave threads to produce raised, textured artwork on fabric backings. These patches are widely used for:

    • Uniforms & Workwear: Many businesses and organizations use custom logo patches on uniforms for branding and professionalism.
    • Fashion & Accessories: Unique patches add a stylish touch to jackets, jeans, hats, and bags.
    • Sports & Clubs: Teams, bikers, and social clubs wear personalized patches to showcase unity.
    • Commemorative & Military Uses: Military personnel, police officers, and fire departments wear embroidered patches as rank identifiers.
    • Event Merchandise: Whether it’s a music festival, corporate event, or charity fundraiser, custom patches make excellent giveaways.

    Embroidered Patches vs. Woven Patches – What’s the Difference?

    Choosing between embroidered patches vs woven patches depends on your design needs. While both styles offer durability and customization, their textures and details differ:

    Embroidered Patches:

    • Textured, raised design with depth
    • Best for bold, less intricate logos
    • Classic and premium appearance

    Woven Patches:

    • Flat, thread-woven design for high detail
    • Ideal for intricate logos and fine text
    • Sleek, smooth look

    If you want a patch with an elegant, handcrafted look, custom embroidered patches are the perfect choice. However, for high-definition designs, woven patches may be a better option.

    How to Choose High-Quality Custom Embroidered Patches?

    Selecting high-quality custom embroidered name patches requires careful consideration of several factors:

    1. Stitch Density & Thread Quality

    A well-made patch has a high stitch count, making the embroidery tighter and more defined. Opt for high-quality threads such as rayon or polyester for durability.

    2. Fabric & Backing Material

    The base fabric impacts the patch’s longevity. Twill, felt, and cotton blends are commonly used for custom patches. The backing also matters—whether it’s iron-on, Velcro, or adhesive backing, choose one that suits your application needs.

    A guide for you: How to Care for and Maintain Your Embroidered Patches?

    3. Color Accuracy & Customization

    A good embroidered patch manufacturer should offer precise color matching and custom options to ensure your patches reflect your vision.

    4. Edge Styles: Merrowed vs. Heat-Cut Borders

    • Merrowed Borders: Thick stitched edges for a bold outline (best for regular shapes).
    • Heat-Cut Borders: Cleanly cut edges for detailed, custom-shaped patches.

    Best Materials and Techniques for Embroidered Patches Explained

    The choice of material and stitching technique significantly impacts the patch’s durability and look.

    Materials for Custom Embroidered Patches

    • Twill Fabric: The most popular choice for custom embroidered patches due to its strength and smooth finish.
    • Felt: A soft, classic material often used for vintage-style patches.
    • Polyester Blends: Offers vibrant colors and durability, ideal for long-term wear.
    • Leather: Used for custom leather patches, giving a premium, rugged appearance.

    Techniques for High-Quality Embroidery

    • Satin Stitch: Ideal for text and borders, providing a polished look.
    • Fill Stitch: Used for covering large areas with a textured finish.
    • 3D Puff Embroidery: Creates a raised effect for a bold, standout design.

    How to Order Embroidered Patches from Patch Makers UK?

    Ordering custom embroidered patches from Patch Makers UK is simple and hassle-free. Here’s how you can get started:

    Step 1: Choose Your Patch Style & Size

    Select from custom embroidered patches, chenille patches, woven patches, leather patches, or sublimated patches based on your preference.

    Step 2: Upload Your Design

    Send your artwork or logo, and the team at Patch Makers UK will turn it into a professionally stitched patch.

    Step 3: Select Backing & Border Options

    Choose from iron-on, Velcro, adhesive, sew-on, or magnetic backing to suit your application. Decide between merrowed borders or heat-cut edges for the perfect finishing touch.

    Step 4: Get a Digital Proof & Approve the Design

    Before production begins, you’ll receive a mockup of your custom patches for approval.

    Step 5: Bulk Order & Fast Shipping

    Once finalized, your personalized embroidered patches will be manufactured and shipped swiftly.

    A variety of custom embroidered name patches

    Top Professional Embroidered Patch Makers Online

    Finding reliable embroidered patch manufacturers is crucial to getting high-quality patches that last. Here’s what to look for in a trusted supplier:

    1. Experience & Reputation

    Choose manufacturers with extensive industry experience and positive customer feedback. A company specializing in custom embroidered name patches should have a solid track record of delivering premium designs.

    2. Customization Options

    A good supplier should offer various customization features, including:

    • A wide range of fabric choices
    • Different backing options (iron-on, Velcro, adhesive)
    • Border styles like merrowed borders or laser-cut edges

    3. Competitive Pricing & Bulk Discounts

    For businesses, ordering bulk embroidered patches can save money. Look for manufacturers that offer wholesale pricing, ensuring you get affordable yet high-quality custom patches.

    4. Fast Turnaround & Shipping

    Timely delivery is essential. Whether you need cheap custom patches for businesses or personalized embroidered patches for an event, opt for a company offering fast shipping without compromising on quality.

    Custom Patches vs Direct Embroidery – Which is Better?

    If you’re torn between custom embroidered patches and direct embroidery, consider the pros and cons of each:

    Custom Embroidered Patches

    Removable & Versatile – Easily attach and remove patches as needed
    Cost-Effective – More affordable than embroidering directly onto garments
    Durable – Lasts longer since it’s stitched on a separate fabric base

    Direct Embroidery

    Permanent – Cannot be removed or transferred to another garment
    Expensive – More costly than custom patches, especially for bulk orders
    Limited Placement – Not suitable for all fabrics and materials

    If you want flexibility and durability, custom embroidered name patches are the better choice over direct embroidery.

    Buy Bulk Embroidered Patches – Best Deals & Fast Shipping!

    Buying bulk embroidered patches is the best way to get premium-quality patches at discounted rates. Whether you need custom logo patches for brands or personalized patches for an event, bulk orders ensure:

    • Consistent Quality – Uniform stitching and color matching
    • Cost Savings – Discounts on large orders
    • Faster Production – Mass production speeds up delivery

    When purchasing in bulk, ensure your supplier offers customization flexibility and affordable pricing on custom patches.

    Best Embroidered Patch Manufacturers in the UK – Compare & Choose!

    If you’re looking for top professional embroidered patch makers online, here’s what you should consider before making a decision:

    Customer Reviews & Testimonials – Check online ratings and customer feedback
    Design Proofing & Revisions – Ensure they offer digital mockups before finalizing orders
    Material Quality – Look for high-grade twill, felt, or polyester fabric
    Shipping & Turnaround Time – Choose a manufacturer with quick delivery options

    Some suppliers even offer cheap custom patches for businesses, making it easier to get high-quality patches without breaking the bank.

    Get Custom Logo Patches for Brands – Professional & Durable

    Businesses and organizations rely on custom logo patches to enhance their branding. Whether you need custom embroidered patches for staff uniforms, promotional giveaways, or product branding, high-quality embroidery ensures a professional look.

    Key benefits of custom logo patches include:

    🔹 Brand Recognition – Enhances your business’s visibility
    🔹 Uniform Identity – Creates a cohesive and professional appearance
    🔹 Durability – Withstands wear and tear better than printed designs

    Ordering from a trusted embroidered patch manufacturer guarantees premium-quality patches that leave a lasting impression.

    Read also: Top 5 Trending Custom Embroidered Patch Designs You’ll See Everywhere in 2025

    How to Order Affordable Custom Embroidered Patches Online?

    Ordering custom patches online has never been easier. Here’s how to get started:

    Step 1: Choose a Reputable Supplier

    Look for a manufacturer with high ratings, bulk discounts, and fast shipping. Patch Makers UK is a leading provider of custom embroidered patches with a wide range of options.

    Step 2: Upload Your Design

    Submit your logo, text, or artwork. A professional team will convert it into an embroidery-ready file.

    Step 3: Select Size, Colors & Backing

    Pick your preferred size, thread colors, and backing options (iron-on, sew-on, Velcro, or adhesive).

    Step 4: Approve the Digital Proof

    Before production starts, review a mockup of your patch. Request changes if necessary.

    Step 5: Place Your Order & Receive Fast Shipping

    Once approved, your patches will be produced and shipped quickly!

    Why Choose Patch Makers UK for Your Custom Embroidered Name Patches?

    From classic custom embroidered patches for work uniforms to eye-catching personalized embroidered patches for fashion statements, the demand for high-quality embroidery is rising.

    When it comes to bespoke embroidered patches, Patch Makers UK is your go-to source. Want to create your own custom embroidered name patches? Get in touch with Patch Makers UK today and bring your vision to life with high-quality, professionally embroidered patches!